
Epoxy Floor Installation: What to Expect
Epoxy floor installation is more than rolling on a coating — it’s a defined sequence of steps that each build on the one before. Understanding what happens during a professional installation helps you know what to expect and why each stage matters for the final result.

The Short Answer
A professional epoxy floor installation moves through five stages: evaluating the concrete, preparing the surface, repairing any cracks or damage, applying the coating system, and allowing the floor to cure properly. The contractor who performs the work assesses your specific floor before recommending a system and explains the expected schedule before work begins.
What Happens During Professional Epoxy Floor Installation?
A reliable installation follows a consistent sequence. Each step is necessary — skipping or rushing one creates conditions that affect every step that follows.
01
Evaluate the Concrete
The contractor begins by examining the concrete itself: its condition, porosity, moisture levels, and any existing coatings or damage. This assessment shapes every decision that follows, from which coating system is appropriate to how extensive the preparation needs to be.
02
Prepare the Surface
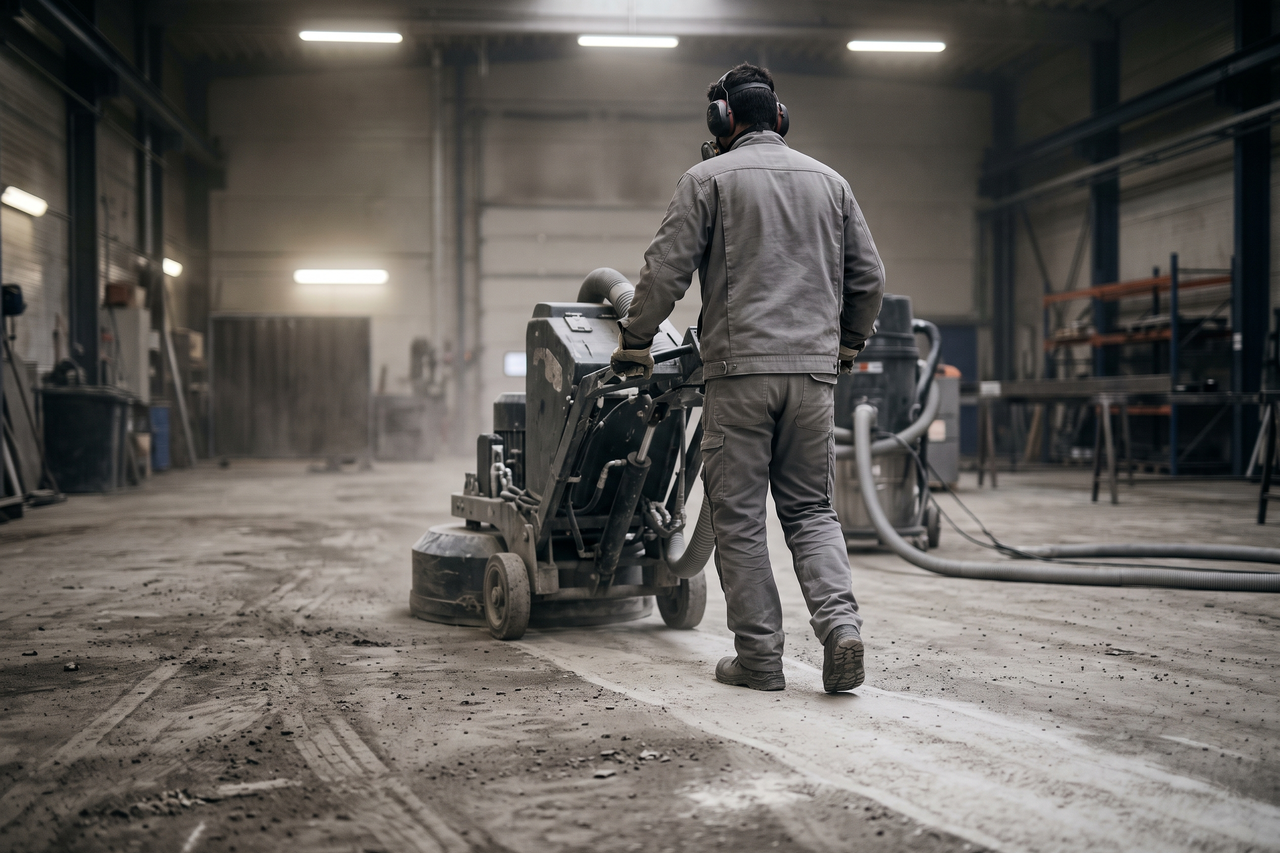
Concrete preparation typically involves mechanical grinding or shot blasting to open the pores of the surface and give the epoxy a proper profile to bond with. This is the most important step in the process. Surface preparation requirements vary based on the floor’s condition and the coating system being applied.
03
Repair Cracks and Defects
Before any coating goes down, cracks, spalls, and other surface damage are filled and repaired. Coating over unaddressed damage compromises both the look and the integrity of the finished floor.
04
Apply the Coating System
The epoxy or polyaspartic system is applied in the sequence specified by the manufacturer and suited to the project — typically a primer coat, broadcast layer if decorative flake is included, and one or more topcoats. Each layer needs adequate time to cure before the next is applied.
05
Allow the Floor to Cure
Curing happens in stages. Light foot traffic is permitted first, followed by vehicles and rolling loads after additional curing time, and finally full chemical resistance is achieved once the coating has fully hardened. The contractor explains the expected sequence before work begins.
What Makes a Professional Installation Different?
A professionally installed epoxy floor performs reliably over time because every step is matched to the actual conditions of the floor — not a one-size-fits-all approach. The contractor evaluates your concrete, recommends the right system, and confirms the floor is ready for the next step before proceeding.
That methodical sequence matters because epoxy adhesion depends on more than mixing the product correctly. Moisture in the slab, surface contamination, or inadequate profiling can all undermine a coating regardless of its quality. A professional assessment identifies those conditions before they become problems.
The flooring contractor we connect you with carries the knowledge to read the floor before the work starts — and to explain what the floor needs, why, and what you can expect from the finished result.
Why Concrete Preparation Matters
For a closer look at the prep stage, our guide to concrete preparation for epoxy flooring covers grinding, crack repair, and moisture testing in detail.
Preparation is the foundation of every successful epoxy installation. A surface that hasn’t been properly profiled won’t give the coating adequate mechanical adhesion — and that gap is often where floor failures begin, alongside factors like moisture and the coating system selected.
Grinding opens the concrete’s pores and creates a texture that gives the epoxy something to grip. On smooth or previously sealed floors, skipping this step is a common contributor to early delamination. The depth and method of grinding vary based on the floor’s existing state.
Repairing Cracks and Surface Damage
Visible cracks and spalls are addressed during preparation, before the coating system goes on. Filling these defects creates a more uniform surface and reduces the likelihood that movement or moisture will telegraph through the finished coating.
Not every crack is treated the same way. Hairline surface cracks are often bridged with the primer coat when conditions are right. Larger or moving cracks may require a flexible filler or a structural repair depending on the cause. The contractor assesses each situation and explains what the repair involves.
Skipping repairs or coating over them introduces a weak point into the finished floor — one that tends to reveal itself over time as the coating edges lift or the crack re-opens beneath the surface.
Applying the Epoxy Coating System
Choosing between epoxy and polyaspartic coatings isn’t just a cost question — our comparison guide on epoxy vs. polyaspartic flooring explains how the two systems differ in durability, install time, and performance characteristics.
Once preparation is complete, the coating system is applied in layers. Most installations begin with a penetrating primer coat that bonds to the prepared concrete and seals the surface. Decorative broadcast flake, if included, is applied into the wet base coat before it cures.
Topcoats seal in the flake and provide abrasion and chemical resistance. The number of topcoats, the product used, and the film thickness all depend on the system specified for the project and the conditions of the space. High-traffic commercial floors typically require more robust systems than residential garages.
Application conditions — particularly temperature and humidity — affect how each layer cures, and a professional installer monitors these throughout the process.
How Long Does Epoxy Flooring Take to Cure?
For a sense of what project costs look like at different floor sizes, our epoxy floor coating cost guide walks through the factors that influence pricing.
Curing happens in distinct stages, and understanding them helps you plan around the project. Light foot traffic is typically permitted first, once the surface has hardened enough to handle it without damage. Vehicle traffic follows after additional curing time — the coating needs more strength to withstand rolling loads and turning tires than it does to handle foot traffic.
Full chemical resistance — the point at which the floor can handle spills, cleaning products, and heavy loads without risk of damage — comes last, after the coating has fully cross-linked at depth.
The exact schedule depends on the coating product, the number of coats, the ambient temperature, and the humidity level during and after application. The contractor explains the expected curing sequence before work begins so you know how to plan.
Frequently Asked Questions
Does the contractor need to test our concrete before choosing a coating system?
Yes. The contractor assesses the concrete’s condition, porosity, and moisture levels before recommending any system. The evaluation determines which coating is appropriate and what preparation the floor needs — you won’t be asked to choose a product before the floor has been looked at.
What happens if we skip the surface preparation step?
Surface preparation — primarily grinding — is what allows the epoxy to form a mechanical bond with the concrete. Without it, the coating sits on top of the surface rather than bonding to it, and delamination becomes likely. A professional installation includes this step as a matter of course.
Can epoxy be installed over an existing coating?
In some cases, yes — but it depends on what the existing coating is, how well it’s adhering, and what the contractor finds during evaluation. A loose or failing coating usually needs to be removed before a new system is applied. The contractor assesses the existing surface and gives you a recommendation based on what they find.
How do I know when it's safe to drive on the floor again?
The contractor explains the curing stages before work begins — including when light foot traffic is safe, when vehicles can return, and when the floor reaches full chemical resistance. The timeline depends on the specific products used, the number of coats, and the conditions during curing.
What if cracks appear in the concrete after the epoxy is installed?
New cracks that develop after installation — due to concrete movement or settlement — are a concrete problem, not a coating failure. The installer can advise on whether the crack needs attention and what the options are. This is different from pre-existing cracks that weren’t repaired before the coating went down.
Does temperature affect the installation or curing?
Yes. Most epoxy and polyaspartic systems have acceptable temperature and humidity ranges for application and curing. The contractor monitors these conditions and schedules the work accordingly. Installations attempted outside these parameters risk adhesion problems or improper curing.
Ready to Upgrade Your Concrete Floor?
If you’re ready to connect with a flooring contractor serving Ottumwa, IA and surrounding areas, use the form below to get started.